No Maintenance

There are a lot of good reasons not to paint houses. And one of the best is that you will have to do it again and again, and if you don’t your house will look bad and fall apart. I have learned about myself that I prefer making new things to fixing old ones and so forcing myself to choose between painting my house or letting it fall apart, I am going to choose a third option: no paint. I want to be clear I am not advocating for vinyl siding here. But what cladding options are there for houses that don’t require any maintenance? What material can you leave outside for decades and never do anything to it ever and it will last?

Rain Screens

Before I go into the material that will go on the outside of the house I want to talk about what goes behind it. Pretty much every house today is constructed with a weather resistant barrier under the siding. Asphalt felt or house wrap or some proprietary integral house wrap like Zip system is behind the cladding preventing water from getting into the wall. Several years ago we built a few houses that had dissimilar and nontraditional siding materials, and we turned to rain screen construction to simplify the waterproofing details. These were open rain screens, a UV resistant WRB flashed appropriately at all junctures, vertical battens attached to the wall, the siding attached to the battens creating an air space between the back of the siding and the WRB where water can drain to the ground and air can circulate to dry the back of the siding and the WRB. The open part of the open rain screen is the spaces that are left between the individual pieces of cladding. Durable wood planks applied horizontally, aluminum composite panels, cement board panels or planks, with 1/4″ to 5/16″ spaces between the pieces. I have looked at how much water is behind the pieces lowest on the wall draining down the WRB during driving rain and it is not much, a few drips. You don’t really try to keep the water from getting behind the siding, you just make sure that when it gets back there it has a clear open path to exit at the bottom of the wall, siding stays well ventilated so it can dry on all sides. I always knew this house would have its cladding on a rain screen. That is the first step toward durability.

Naturally durable exterior materials

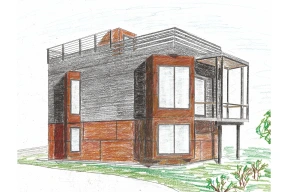
There are some really cool commercial claddings like Trespa and the previously mentioned aluminum composite panels that will hold up outside for a long time, but the budget of the project eliminated those. Excluding those leaves masonry, metal, and possibly a durable wood, but it is asking a lot of even the most durable of woods to last without some protection from the sun and rain.

I have had a couple projects recently where Cor-Ten in some form was considered for building cladding. Cor-Ten is a steel alloy that rusts on its surface, but doesn’t continue to rust and degrade, enabling it to survive in the elements unprotected for a long time. We never ended up using it, though. I have used other types of metal siding, painted and galvalume roofing panels with gasket screws and T-panel siding with good result and like them as building siding. They are pretty affordable depending on the product, and especially so if you include the money not spent on painting.

Brick, stone, block, and concrete are traditional materials that have been used on the exterior  of buildings for almost as long as there have been buildings, but for me, on this project, I was looking for a different feel, something less massive and imposing.

That leaves durable woods. Wood shingles obviously are a traditional application of exterior wood cladding that doesn’t have to be painted and will hold up in very harsh climates, but like the masonry, shingles just didn’t capture the what I wanted for the house, but having decided on metal, Cor-Ten actually, I also didn’t want the house to only be metal. It needed variety and something to soften the box car aesthetic of the Cor-Ten. I was trying to find a way to incorporate wood, avoiding tropical hardwoods for the obvious reasons, but still not wanting to have to maintain the siding.

This is going to be an experiment

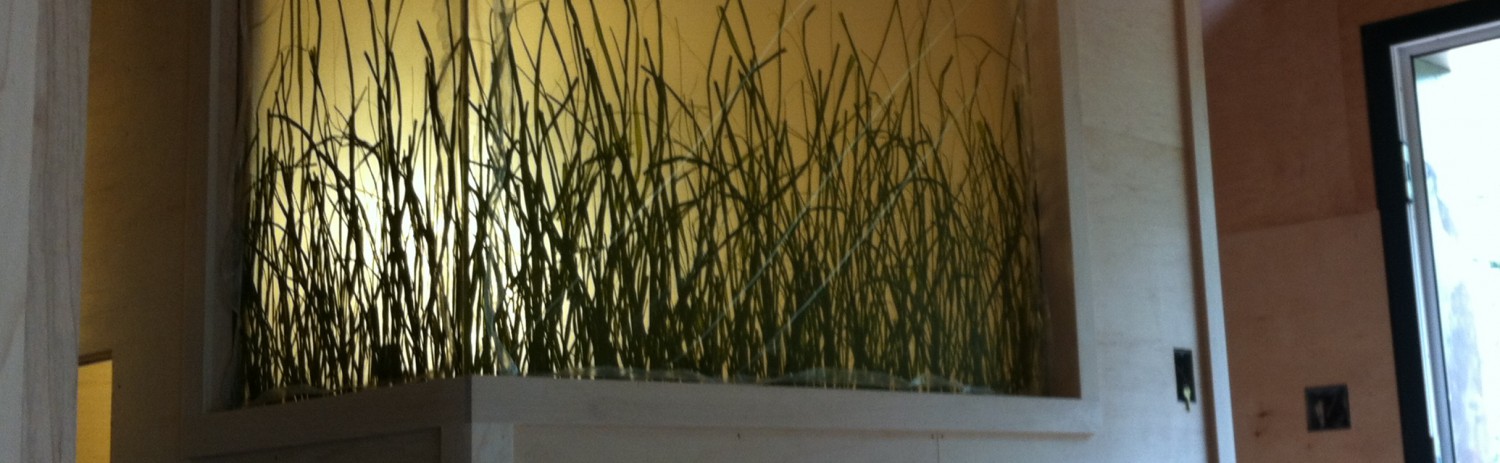
Recently and old process for preserving wood siding has become trendy, especially among modern structures. I don’t remember the Japanese name of the process and am not gong to look it up, and put it here as though I do. It involves charring to varying extents an already durable wood siding, and then applying the siding to the wall with the charred side to the elements. The charcoal on the surface being basically inert protects the wood underneath from sunlight and rot. Traditionally a native cedar or cypress was used, but apparently any rot and water-resistant wood is supposed to work. I don’t know anybody who has actually done this, and although the concept seems sound really am not sure how this would behave in the southeastern US. But it allegedly protects wood for a long time. I decided I would try this. This may be a colossal mistake, and my effort to not paint may turn into residing the failed charred wood portions of the house, but I am hoping that with good species choice, the advantage of a rain screen installation and a few precautions it has a chance of working.

Native wood

In looking for a wood species to use I wanted something that was grown locally. Cypress and cedar are both native to Georgia and durable woods suitable for exterior use. But both eastern white cedar and cypress are harvested out of coastal and south Georgia, and by most accounts not in a way that manages the resource well. We are lucky to have a local lumber supplier here that has started cutting and drying locally cut trees, so I talked to him about getting white oak to char and use as siding. White oak isn’t a species commonly thought of for exterior uses, but it’s tested durability outside is excellent. So the first level will be clad with Cor-Ten 4′ x 8′ panels and the second level with be charred local cut white oak. As an additional protection for the white oak we will seal the cut ends and the back before installation. We will see how it goes.

Meeting Standards

Mary and I have lived and built in Athens’ historic districts since 1992. I realize that a builder expressing frustration with a historic preservation process is cliché, but I will say that after building the two homes we lived in that were within historic districts, having the opportunity to design and build our house outside of historic preservation oversite sounded good to us. It was a requirement, actually, of whatever lot we were going to buy and build on.

Of course, there are standards, other than historic preservation, and outside of building code, that must be met in the construction of homes, and a desire to reduce the complicating factors of boards or commissions, led me to attempt to design this latest house completely within the zoning standards. This sounds like I am a scofflaw trying to reform, but the zoning standards for the zone where our house would be built require a lot to be no smaller than 5000 sq. ft. Ours is less than a third of that. On a lot this small, where design options can be extremely limited, gaining some relief from setbacks or other requirements can provide needed flexibility. I tried to stay within the rules, it didn’t quite go that way, and I ended up before the Hearings Board asking for variances in the end.

Designing within the lines

The greatest regulatory hurdles in Athens to building on very small lots are the building setbacks from the property lines, which limits the building foot print, overall building height, which functionally limits the number of stories, and the requirement that every single family house has to have two off street parking spaces, which at its smallest would consume 325 sq. ft. Setbacks first. The very first lines I put on a piece of paper in this design were the setbacks, those mostly became the exterior walls. Six feet for the sides, fifteen in front and ten in back. Needing to orient some walls to capture southern light, I took advantage of a setback encroachment that allows bay windows to project 2 feet into the setbacks. This gave us our southern exposure and gained a little volume for the interior.

Wanting at least one parking space that was not on the street we took a notch out of the northwest corner of the foot print to allow a narrow spot where a car can pull fully off the street; the code allows for two available on street parking spots to count as one off street spot which would give us our second required spot. That lost area on the bottom floor was regained on the second level by a cantilever over part of the parking area.

Finally the house, with two levels plus a loft, exceeded the maximum allowable building height of 25 feet. To accommodate this I placed the first level 2 feet below finished grade, ending up with a finished building height of 24′ – 4″. Using nearly all of the available space on the lot and building as tall as we are able got us to 1023 sq. ft. which is just over the required 1000 sq. ft. minimum house size in Athens.

What I got wrong

I submitted my site plan assuming we had covered all of the necessary requirements. A day later I got a message from the planner who was working on my permit that the plan did not have the necessary two off street parking spaces, and after further discussion I came to understand that there weren’t any spaces on the street that met the criteria to substitute for the lack of on site parking. I needed a variance to proceed. I have done variances in the past and felt this would be a simple and sure argument. When I turned in my variance request application though additional planners reviewed the site plan and determined that my setbacks were measured from the current right-of-way lines, that is the property lines, not from the future right-of-way lines.

A moment to talk about future right-of-way. Future rights-of-way are additional corridor width that the city has determined may be required in the future for street widening, some streets have specific future right-of-way widths based on assessments of likely future needs. Every other street has a future right-of-way of 50 feet regardless of how narrow or unused the street is, no matter the extent of the encroachment of existing houses. Our lot has frontage on two streets, one a relatively busy residential thoroughfare, the other little more than an alley, and measuring from the future rights-of-way of both streets reduced the buildable depth to about 10 feet. Including future right-of-way is something I know, but in practice the planning staff will only require site plans to show it and setbacks to be measured from it about half the time, probably less. And in fact, this time had the parking issue not come up the original planner was set to approve the plans. This added two more variances to the project, requesting a reduction in both the front and rear yard setbacks.

And in the end

It all worked out. Two and a half months and six hundred dollars later the plan was approved as drawn.

Energy Efficient Design

The Plans

Floor plans of the first level, with the bedroom and office, and second level, the main living area.
The plan of the loft area and the site layout
A verticle section of the house, showing the stairs, floor levels, loft, and roof access.
A vertical section of the house, showing the stairs, floor levels, loft, and roof access.

And a perspective drawing from the “front”, south corner of the house.

View from the south, with the screened porch, bay projections and roof access shown.

I draw by hand, so even though the plans may look like they are from a high school project, I swear I am a professional.

One of the initial goals of the project is that the house would be net zero or as close as we can get, given the limited roof area available for solar generation. Small houses are inherently efficient, but still have to heat water and refrigerate food, wash clothes and dishes. Behavior can have a significant impact on the energy use of many household activities, we hang laundry out to dry, for example, which in the south works year round. But in designing to reduce energy use I concentrated on the building envelope and passive solar potential.

Foot Thick Walls

I like cellulose insulation a lot, and use it on almost all of my projects. Besides being a good insulator, it has very little embodied energy, fills wall cavities well, and buffers water vapor in the wall. I am ambivalent about foam; spray foam is certainly useful and I have used it frequently (open cell) for roof lines and band joists. I also use sheet foam under and at the edge of slabs, for roof tapers and even over sheathing for added insulation. But I am skeptical of foam as well; though spray foam is a good air seal, the standard installation, which is expensive relative to cellulose with a separate air barrier, produces about R20, going beyond that is really expensive. Sheet foam is difficult to recycle and I think that if our goal is to build a more sustainable house the materials generally ought to be able to return to a natural state.

Between cellulose and foam, in applications where they work more or less equally well, I will choose cellulose; so on this project, where I wanted a highly insulated wall, from the beginning I planned on building a double stud wall, 12″ thick, filled with dense pack cellulose. One disadvantage of double stud construction is the thermal bridge formed by the joists and rafters passing through the wall to the exterior bearing wall. To eliminate that problem, the interior wall will be the bearing wall, allowing an insulation layer to extend uninterrupted around the entire building. This requires bracing the interior wall for shear strength,  accomplished here by let in bracing. The exterior wall I will sheath with 1/2″ CDX plywood taped at the seams to act as an air barrier and a substrate for the cladding. I was proud to have worked this out, and then found that, of course, someone had already come up with this. Robert Riversong in Vermont has been doing a very similar construction for decades; he calls it a modified Larsen truss. The 12″ of dense packed cellulose will insulate the walls to about R40.

But there are areas that are difficult to insulate without using foam. The main level will be a slab set 24″ below grade poured within a 3′ concrete knee wall that will be in line with the exterior frame wall. Under the slab will be insulated with 4″ of EPS with 2″ of EPS extending up the knee wall. The roof will be framed level using 16″ I joists with the 1/4″ slope formed by foam roof tapers that will vary from 1/2″ to 3″, and a 2″ layer of XPS foam on top of the roof membrane, insulating the roof to an average of about R75.

Extremely Efficient Windows and Doors

Before I talk about the windows, I want to admit that I understand that triple glazed windows don’t make sense in Georgia. With Georgia Power charging 11 cents per Kwh, we’ll never make back the difference in cost over double glazing. A difference I don’t even know because I didn’t find out. What we are using is Intus triple glazed Eforte tilt/turn windows and doors. The average u value is around .14. Mostly I did this because I wanted to, but at the same time the R value of the windows and doors has a disproportionate effect on the overall R value of the wall, and with limited solar capability we need to reduce our load as much as we can, and super airtight super efficient windows and doors will help with that.

Passive Solar: Getting a little back

This is fairly well understood: southern facing high solar heat gain glass with an overhang above that blocks the high angle summer sun but lets in the low angle winter sun. Minimize your eastern and especially western glass, if you have western or eastern glass make sure it is very low solar gain. This last bit is especially true in the South where high summer afternoon temperatures coupled with sun blazing into a western window can make a room uncomfortable. The sun you do want to come in needs something to warm that can hold a lot of heat to temper the heat gain.

In designing the overhang you get to pick the date the window will be fully shaded by manipulating the overhang projection and its height above the window. But here where it can be hot well into September you really want to block not only mid summer sun but most of the early fall and late spring sun too. Full shading of southern facing windows a month on the summer side of the equinoxes seems like a pretty good balance here. Which means that from April 20 to August 20 no direct sun would come through the window. But with all the worry about the summer heat here we actually have more heating degree days than cooling degree days in Athens, making capturing a little extra heat from the winter sun worthwhile.

Our lot is oriented 45 degrees from north/south making south-facing windows hard to come by, and opening up every side of the building to direct sun; even more so in the summer with the northeast and northwest sides exposed to early morning and late afternoon sun. To overcome the lack of a southern wall I designed two bay projections placed at 45 degrees to the main walls to have southern windows. One is a small triangular bay with tall narrow windows, the other a broad bay cutting across the southeast corner of the building with large windows. Both bays have high solar gain glass. The rest of the windows in the house are on the northeast and northwest walls and have low solar gain glass. There are no windows facing southwest and the door to the southeast is under the screened porch roof. The second half of the system, the thermal mass, is handled by concrete slab floors on both the first and second levels.

Heat, and oh yeah, Humidity

Building Science Corp published some studies a while ago about highly insulated houses in Houston they worked on as part of the Building America program, if I remember right Pulte was the builder. It turns out that when you super insulate houses you don’t need to run your air conditioning very much. But cooling systems don’t just cool, they remove humidity, and if they aren’t running because the thermostat says it’s not hot, they’re not pulling water out of the air even if it’s humid, and in Houston, in the summer, apparently it’s humid (I’ve never been there). They went back and installed dehumidifiers to correct the moisture issue.

Athens is humid enough in the summer to have the same problem. So the cooling system for the house will be a mini split with a head on each level. Mini splits can pull a lot of water out of the air and can have a dehumidifier setting to continue pulling water out even when they aren’t cooling, and they are about as efficient as you can get in an air source heat pump.

Solar

With the house taking up much of the lot, and a car taking up some more, there won’t be much outdoor area left for garden or patio or really anything. So we are utilizing as much of the roof for outdoor space as we can. Roughly half will be planted, herbs and vegetables mostly; the other half will be a patio seating area and the structure that will enclose the stairs and door for roof access. That uses all the roof area so to fit solar we will set the panels on a structure that will go over the seating area. The panels will provide some shade for the patio and be out-of-the-way. That is still a limited space, but should fit two solar thermal panels for water heating and six 60 cell PV panels. Because the array is so small I will get the most efficient panels I can find, LG is making a 300w 60 cell panel. That would still only provide 1800w max output. Net Zero? It’s not a lot of power, we’ll see if we get there.

Starting the design

I have trouble remembering exactly how we started down this path, but the gist of it is that we had built and moved a couple times, going from a small house (1200 sq. ft.) to bigger to bigger again, ending in a 3000 sq. ft. house with a full basement. After our daughters left home we generally used exactly 3 of the rooms in the last house. I tell this story to people and that seems pretty common, We decided we wanted something smaller, more efficient, both in size and energy use, but didn’t have a firm idea of how that would take shape. Several years earlier, a house burned a couple blocks from where we lived, pretty much to the ground. After it got cleaned up, all that was left were the remnants of a foundation and a 6′ plank fence charred from the fire; the owner painted “for sale” and a phone number on the fence, and it sat that way for years. I thought about that lot occasionally, looked at the dimensions online, figured rough scenarios for siting a house, which amounted to drawing in the setbacks and placing the building on them, on all four sides. Between 2008 and 2011 we weren’t ready to move and didn’t have any extra cash for buying property, but when we started to think much more seriously about a move, that lot was still sitting vacant; the portion of the fence with the phone number had fallen and was gone. Figuring it was probably still available, I started to really work out a plan that would work on the lot.

The criteria that drove the plan: We wanted the house to be super efficient, net zero as a goal, but achieved primarily through efficiencies, there wouldn’t be much roof area for solar so the house needed to require very little energy to operate. The design needed to meet the zoning requirements; I didn’t want to have the uncertainty of requiring variances in order to build the project. I really wanted the house to be maintenance free once it was finished, no painting, no cleaning gutters; I like building houses, but have learned over many years and several houses I do not like maintaining them. And here is a big one, though it would be small and have only one permanent bedroom, our girls would be coming home from school for breaks and we have good friends who visit from Atlanta often, there are five of them; the house would have to sleep nine comfortably. Last we wanted to do the whole thing, land and all for around $100,000. We’ll see what “around” means as we get further into it.

Each of the criteria will be the subject of its own future post, but now I’ll show a couple photos of the lot before construction. I’ll add the plans and a perspective drawing at the next post.

A view of the lot from the east
A view of the lot from the west

Small House Small Lot

Over the next several months I will chronicle the design and construction of our small house on our small lot in Athens, Ga. The design process started in the fall of 2013, so much of that telling will be relating something that has already happened. At this point we have just poured the foundation walls, so much of the construction still lies ahead. Let’s go ahead and start with the numbers. The lot is 28 feet wide and from 53 to 57 feet long and it has streets on two frontages, the front and the back. The lot area is 1540 square feet. The house is 16 feet wide and 28′ 9″ long; it is two stories plus a partial loft and will have a rooftop patio and garden. the total square footage is 1023 if you include the exterior walls and the stairs. The usable floor area, excluding the exterior walls and stairs is about 725 sq. ft. I am Michael. My wife Mary and I own a small construction company; we primarily build custom homes for clients; most of our work is infill, but this house will be for us. Okay, that’s the intro, in the next post I will include a photo of the lot before construction and floor plans and a rendering of the house, as I start the story of how we arrived at our design.