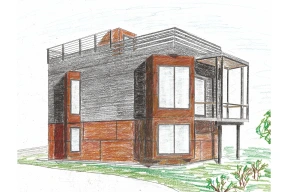
After a second round of studs, hundreds of gussets, several rows of blocking, and the completion of the roof dormer, we are ready to put on the sheathing, and the house will go from a skeleton to having skin. The sheathing for this house will be 1/2″ CDX plywood and will serve multiple roles. The plywood skin braces the house against lateral loads like wind, on this project it will act as the air barrier sealing the house against air moving between the inside and outside of the structure, and it is the substrate supporting both the weather resistive barrier (house wrap) and siding or in our case the battens that support the siding.
Structural Bracing
Before, in a different post, I discussed the let in bracing that we used on the interior walls and the reasons we chose to build those walls that way. What I haven’t mentioned is that as the house got taller and more levels were added it was apparent that there is a lot of flexibility in tall walls with let in braces. I mean a lot. Finally on the roof finishing the framing details at the top of the house a couple people moving around up there would produce enough swaying everyone anywhere in the house could feel it and it was likened to a boat at sea. Very flexible. As the plywood was nailed on, each completed wall section made the house more rigid, and when every surface was finished the motion was gone. Very rigid, just like houses ought to feel.
We started putting on the plywood at the top of the house and worked down. This allowed us to utilize the open wall studs as support for our scaffold jacks. Moving down in 8 foot increments, we could do two courses of plywood before moving the scaffold jacks. At the bottom of the wall where the wood meets the concrete foundation, our last course is a 2′ strip of pressure treated plywood as added insurance against rot for the sheathing that is closest to the ground.


Sheathing as Air Barrier
One of the goals in an energy-efficient house is to minimize the transfer of air between the space inside the house and the outside. This requires a clear distinction for where inside air stops and outside air begins. I have generally used the sheathing to define the separation. I find this line to be cleaner than using the drywall, which is another option, to insure a complete barrier.
For this house, without a pitched roof, we just need to seal the plywood box composed of the sheathing and the roof decking, tied into the foundation wall, which has already been sealed, to create our air barrier for the walls. I chose a sheathing tape for the job on this project. On other houses we have used caulk and duct mastic to seal the plywood joints, and it seems to work well, but with two trips around the house the time required was unattractive. On a house previous to this one we switched and tried Siga Wigluv tape, and I have used the same tape on this project. It is very expensive tape. 70 sheets of plywood for the sheathing and about 18 for the roof deck is $700 in tape to seal the joints, but we can do it when the sheathing goes on, one trip for both nailing plywood and taping joints, which speeds things considerably. For us I think the caulk and mastic is probably cheaper, including the labor, but the lost time for the extra steps has a cost that better business people than me could likely quantify, and my confidence in the tape is much higher than the caulk and mastic. The Wigluv is crazy sticky, and flexible, lifetime of the house kind of sticky.
I plan to get the house sheathed, housewrapped and get the windows and doors installed and get a blower door test to see how we’ve done and identify places we need to seal, before the insulation and siding get in the way of corrective measures.


The front photo shows some things that depart from traditional framing practice, and are a nod to establishing a continuous air barrier. First the parapet for the front roof is already installed when this photo is taken, but the sealing tape is visible up to the parapet, but not on it. We sealed the wall sheathing to the roof deck before the parapet was built, so that the parapet is outside the air barrier where it ought to be. If we had run the exterior wall to the parapet height and sheathed continuously to the top of the parapet, air sealing the area on the wall above the roof deck would have proven to be much more complicated. Also, there will be a porch coming off the second level on the front of the house. The opening in the center of the house in the last photo is the door that enters onto that porch. We haven’t framed that porch yet in order to maintain the air barrier formed by the sheathing and tape. In fact the porch won’t be framed until the house wrap AND the battens for the rain screen are complete, allowing for the air barrier, rain barrier, and the air space behind the siding on the house to be continuous and not interrupted by the porch framing. Something we will talk about later.
The windows have arrived as well as all the products for flashing the openings. Next post I will discuss prepping for the windows and the installation, the roof is going on soon as well, but that might need a separate discussion.

